We've sent you an email with a link to update your password.
A password reset email has been sent to the email address on file for your account, but may take several minutes to show up in your inbox. Please wait at least 10 minutes before attempting another reset.
No account yet?
Registering for this site allows you to access your order status and history. Just fill in the fields below, and we’ll get a new account set up for you in no time. We will only ask you for information necessary to make the purchase process faster and easier.
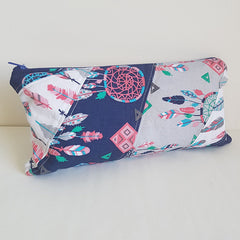
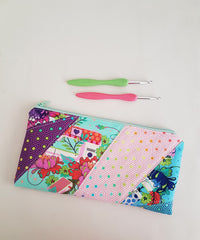
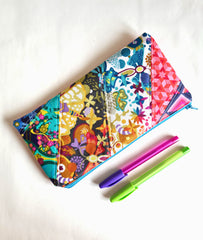
This paper pieced Pouch is perfect as a pencil case or in my case a crochet hook case, but really you can use it to hold anything! It's so adorable the fabric i have used in the tutorial photos is called what a Gem.
This tutorial uses paper piecing in it's easiest form.
If you love this tutorial and want a easy to print (full PDF pattern) version and to sell the purses you make from this pattern, you can purchase the Tutorial to PDF Pattern Bundle + Bonuses
1 piece of exterior fabric (the back) 5.5" x 10.5"
2 pieces of lining fabric 5.5" x 10.5"
1 zipper 12" or longer
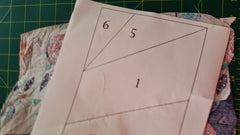
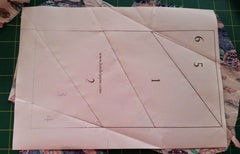
Print out the pattern at 100% no zoom, i have included a 1 inch square to check.
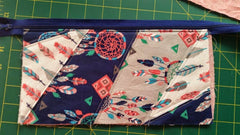
Paper piece the top starting on the middle line. The pattern is marked with each section and the order they are stitch in.
You do this by placing the first fabric piece right side up and the second piece on right side down (right sides together) on the wrong side of the paper with at least 1/4" over the stitch line. Pin or hold to the paper Turn over the paper and stitch on the line.
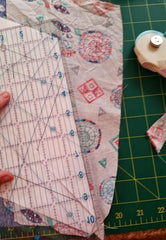
Fold the paper on the line and trim the seam allowance.
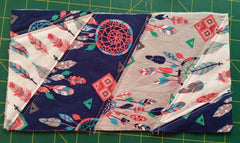
Press the fabric open, work on the next line. until you finish all the lines.
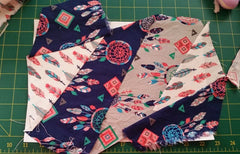
Press well and trim around the piece and remove the paper.
Fuse the fleece/on to the back of the exterior pieces.
Quilt it any way you want. I just followed the seams and did 1/8" on either side.
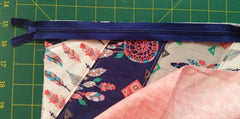
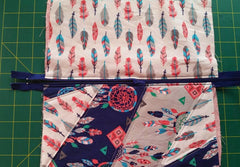
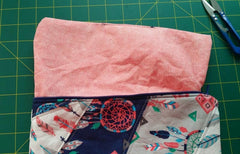
Attach the zip by putting the zip pull side down on the right side top edge and placing a lining piece on top, sew down the side of the zip.
I always use a larger zip because i hate sewing around the zipper pull.
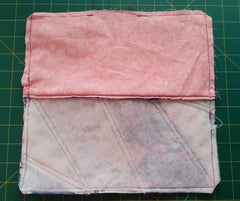
This is what the back of the top looks like attached to the zip (i know that my lining is too big i evened it out after :P)
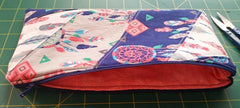
Press open and top stitch away from the zip
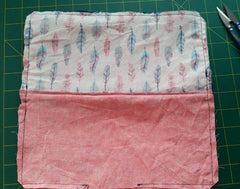
Attach the back and lining the same way.
Press and top stitch
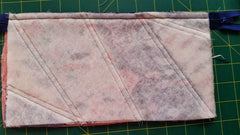
This is to show you how it should look now.
***IMPORTANT***
Unzip the zip to the centre (this will help with turning) also face the zipper teeth towards the lining, it will make it sit better. Now put the 2 lining pieces together right sides together and the front and back pieces together
Pin all around leaving a turning hole on the bottom of the lining side
Stitch all around leaving the hole. When you sew over the zip go over it a few times to secure it.
Trim the corners and the zip ends. (I trimmed so it was even too)
This is what the back looks like.
Pull the pouch through the lining, unzip the pouch as you do this.
Stitch up the lining hole with a edge stitch or you could hand stitch too.
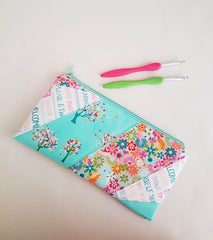
It's done! it's so darn cute!
Sign up for our newsletter below for pattern news and discount codes!
I have never ‘paper pierced’ and this seems weird to me sewing on paper. Is it a complete no no to cut out the shapes add the seam allowance and do it normally? sorry total beginner on this.


Joanne, i’m not sure it would work out. but you could try.
I have never ‘paper pierced’ and this seems weird to me sewing on paper. Is it a complete no no to cut out the shapes add the seam allowance and do it normally? sorry total beginner on this.