Essential Tools for Foundation Paper Piecing
Essential Tools for Foundation Paper Piecing (FPP)
Foundation Paper Piecing (FPP) is an sewing technique for creating precise and intricate quilt blocks. Whether you’re just beginning or looking to improve your FPP skills, having the right tools can make the process easier and more enjoyable. Here’s a list of must-have tools to get started with FPP.
1. Foundation Paper
Choosing the right paper is key for easy stitching and removal. Some great options include:
• Standard printer paper (80gsm) – Affordable and widely available.
• Newsprint paper – Lighter weight and tears easily.
• Specialty foundation paper – Designed specifically for FPP, You can find this at fabric stores however it is the expensive option. However if you love quilt making with FPP then i recommend trying this
2. Sewing Machine with a Short Stitch Length
A shorter stitch length of 1.5 helps perforate the paper, making it easier to remove later as well as ensure your fabric pieces stay secure. Most sewing machines work well for FPP, but make sure yours has A sharp needle installed. I use size 80/12 or 90/14
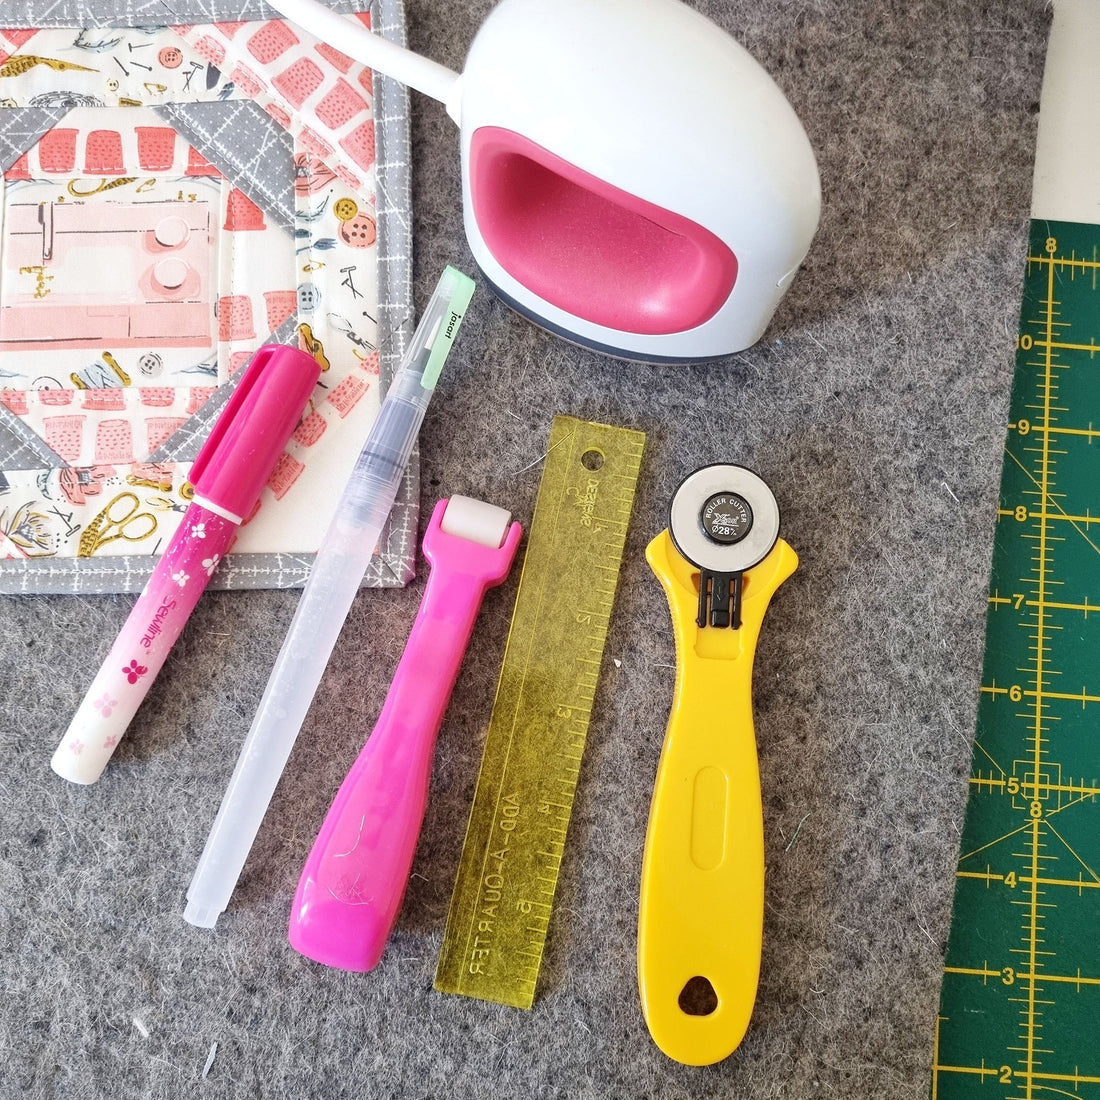
3. Any Quilting Ruler
I really enjoy using an Add-A-Quarter Ruler. This specialty ruler has a ¼” lip that makes trimming seam allowances quick and accurate. It helps ensure perfect piecing without the guesswork. However when starting out you don't need to buy a special ruler you can use your quilting ruler to measure the 1/4" seam allowance.
4. Rotary Cutter and Cutting Mat
A 45mm rotary cutter is What i use for cutting fabric, but i use a 28mm for FPP which is great for small, detailed cuts for FPP sewing. A self-healing cutting mat provides a solid surface for cutting fabric pieces accurately and quickly. I keep this right next to my machine as i'm sewing.
5. Fabric Glue Pen or Washable Glue Stick
A little dab of glue can hold your first fabric piece in place instead of using pins, making the process quicker and neater. You need this stability in your first piece while you position your second piece. You can also use it on larger pieces to ensure they don't move.
6. Sharp Fabric Scissors and Small Snips
Large fabric scissors are great for cutting larger pieces. I also use Small snips to trim threads between sections easily.
7. Iron and Pressing Surface
Pressing after each seam is crucial for flat, crisp results. A mini iron and a wool pressing mat is ideal for pressing small pieces right next to your machine.
8. Starch
Before cutting prepare your fabric for piecing. Starching and pressing your fabric will ensure it lays flatting and presses better while piecing.
9. Lightbox (Optional but Helpful)
A lightbox helps you see through the paper to position fabric accurately, especially when working with dark fabrics or complex designs.
10. Seam Ripper
Mistakes happen! A sharp seam ripper will help you remove stitches cleanly without damaging fabric or paper. Always ensure you are removing stitches from the fabric side to avoid ripping the paper. If a rip does happen then you can use sticky tape and sew over it again.
I really hope this helps you start with Foundation paper piecing. You can find all of my FPP patterns in my shop.